Table of Contents
While the disc sander is an incredibly handy piece of equipment to have in your workshop, it can also be a very dangerous piece of equipment if it is not used correctly. If you are keen to get started using this type of tool, it is vital that you know what it should be used for and how it should be used. This will ensure that you always have a favourable and safe experience.
What Is A Disc Sander Used For?
A disc sander is a high powered tool that is used for sanding down various materials creating a smoother surface. However, it can also be used for removing excess bits of material or waste after cutting a piece of stock.
Owing to the extremely high power of the disc sander, you will find that this is probably the most effective type of powered sander. When you use a disc sander, the finish will be much more complete and smooth. However, this intense power also means that the disc sander has the potential to be incredibly dangerous and is one of the most high-risk tools. Beginners should err on the side of caution when operating, but we will look at this in a little more detail later on.
One of the most notable things about a disc sander is that it is very versatile. If you often work with a wide range of materials, the disc sander will almost certainly be beneficial to you as it is capable of sanding various types of woods, aluminium, plastic and a lot of others.
Furthermore, a disc sander is useful for people who have a complete workshop setup and who require tools that can be installed on a semi-permanent basis. The sander is typically mounted on a table and is a stationary tool, to which you take the material, unlike other types of sander, such as an orbital sander, which you must move towards the material. These pieces of equipment are highly efficient and work well in both commercial and domestic settings.
How Do You Use A Disc Sander Safely?
As we have mentioned, a disc sander is considered to be one of the more dangerous workshop tools to operate owing to its incredible power. One of the most common injuries is caused by the hand making contact with the sander which can cause anything from mild to severe abrasions.
But provided that the operator uses the disc sander safely, there is no reason that an accident should occur. Before you first switch on your machine and get to know its workings, it is imperative that you familiarise yourself with some common sander safety rules.
- Eye protection should always be worn to avoid eye injuries commonly caused by kickback.
- Kickback may be prevented by using the downward side of the sanding disc as opposed to the upward side.
- Disc sanders are designed to be used on a horizontal surface. Using them on a vertical surface could result in damage to the motor.
- The disc sander should always be stable when in operation, securing it to a table or other surface will provide additional stability.
- Be sure that you have a firm grip on the material and do not use hand positions that could cause you to easily slip into the sanding disc.
- When performing maintenance on the sander, always be sure to completely disconnect the power.
- Avoid wearing loose clothing or, if you have long hair, avoid having it hanging loosely.
Once you are confident that you can use the sander safely, you can get started on sanding your first piece of material. When you receive your tool, there will be an instruction manual detailing how to assemble the machine and any additional safety information you need to know; read this first and then assemble the tool according to the instructions.
When you have everything set up, you can turn on the sander. At this point, stand well back and allow the machine to reach full speed before attempting to use it. When it reaches the correct speed, take your piece of material and move it towards the part of the sander you will be using.
A lot of people ask where should you sand on the disc sander and the answer will depend on what you are sanding. If you have a particularly large piece of material, you will probably need to use both sides of the sander. Since the disc moves in an anti-clockwise direction, stick to the left side for smaller pieces of wood or plastic.
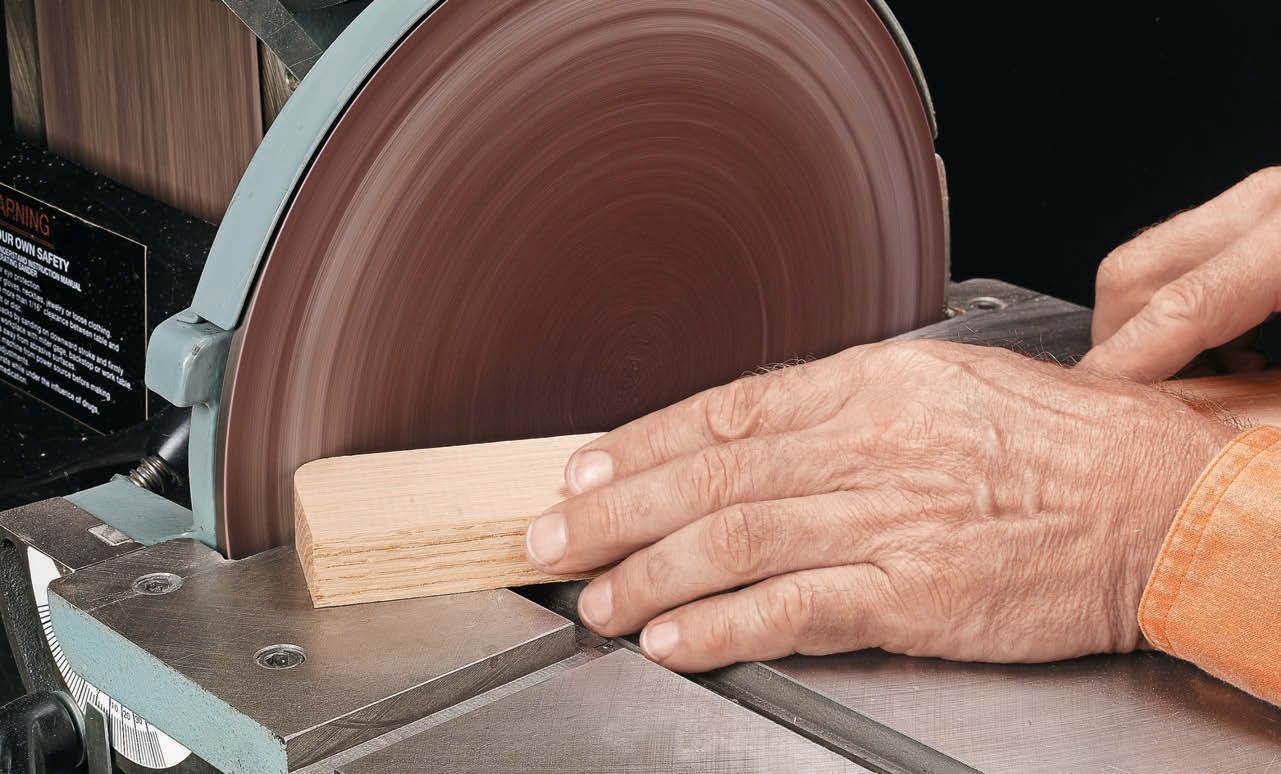
As you move towards the sander, be sure to always keep an eye on where your fingers are. It is an unwritten rule that you should leave at least four inches between your hands and the sander but it is shocking how often people let this slip their minds and place more focus on moving the material than their safety. Take your time with each job to ensure that the material is sanded and your fingers are left intact.
The idea of a power tool is that it will do most of the hard graft. For this reason, you won’t need to apply too much pressure when using your disc sander. You’re going to need to guide the material and move it left to right until it is as smooth as you require but don’t push it into the disc.
What Is The Best Grit For Sanding Wood?
Your sander can be equipped with different grits which have various levels of abrasiveness. Depending on what you are sanding and the result you would like to achieve, there are different grits that will suit your needs.
For example, if you need something much more aggressive, anything between 60 and 80 grit will work well. However, if you want a much finer and smoother finish then you could go to the other end of the scale and opt for something between 160 and 180 grit. Most people will find that 100 grit works well for general use.
One of the biggest issues with power sanders is that they can often leave behind a few scratches that don’t become apparent until after you have finished. The best way to avoid this is to always sand with the wood grain and use the correct grit for the job. You should also ensure that you keep the wood moving at all times as this will help to avoid black marks where too much friction has been applied in one area.
What Sander Is Best For Removing Paint?
DIsc sanders are very versatile pieces of equipment and will do well with many jobs. However, they may not be the best choice for more aggressive jobs such as removing paint. Fortunately, there are many other types of sander that harness the power and ability to meet the demands of this type of work. Typically a belt sander or orbital sander is the best choice for removing paint, but let’s take a look at disc sander alternatives in a little more detail.
Disc Sander Alternatives
- Disc sander for drill – if you favour your power drill over all your other tools then it is possible to use a specific type of attachment that will allow you to sand. Typically, these sanding discs are much smaller but they do come in large packs so you’ll have plenty to last you.
- Orbital sander – An orbital sander is a handheld tool with a sanding surface that moves in a random orbital pattern. They are very lightweight and easy to use and bring the wood up to a very smooth and clear finish.
- Belt sander – a belt sander, as the name may suggest operates on a belt system, around which the sandpaper is fitted. As the tool is switched on, the belt rotates creating a high friction surface on which to sand. These are handheld tools that are ideal for smoothing down very rough surfaces.
Conclusion
A disc sander is a great way to smooth down a variety of different materials and can be installed in both commercial and domestic workshops. For DIY enthusiasts who are looking for a way to finish off projects leaving a smooth surface, this is a viable option. However, the nature of the tool means that accidents can, and do, happen, so you must always operate this type of equipment with special care and attention.